How it works
How to use Screening Room
Seventeen steps from first launch to your first note in Frame.io. Sign-in is a one-time setup; after that, it's browse, watch, and comment.
Sign in with Frame.io
You'll use the Adobe credentials you sign in to Frame.io with on desktop or mobile. Screening Room can't sign in through Google, Apple or Facebook — if your Frame.io account uses one of those, unlink it first.
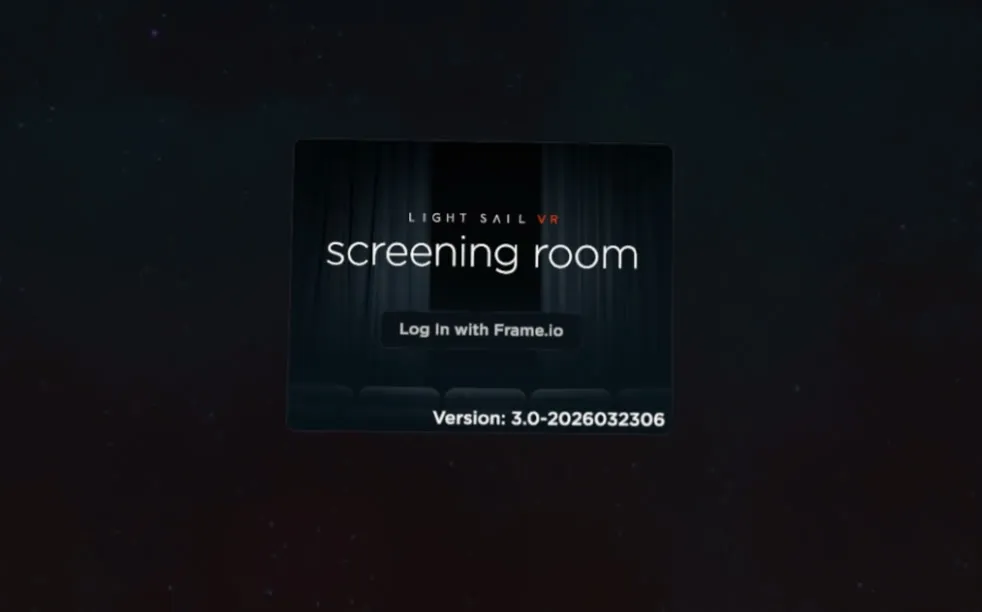
Step 1Launch and choose Log in with Frame.io
The first time you open Screening Room, a window asks you to log in using Frame.io. Point the right controller at the button and squeeze the trigger.
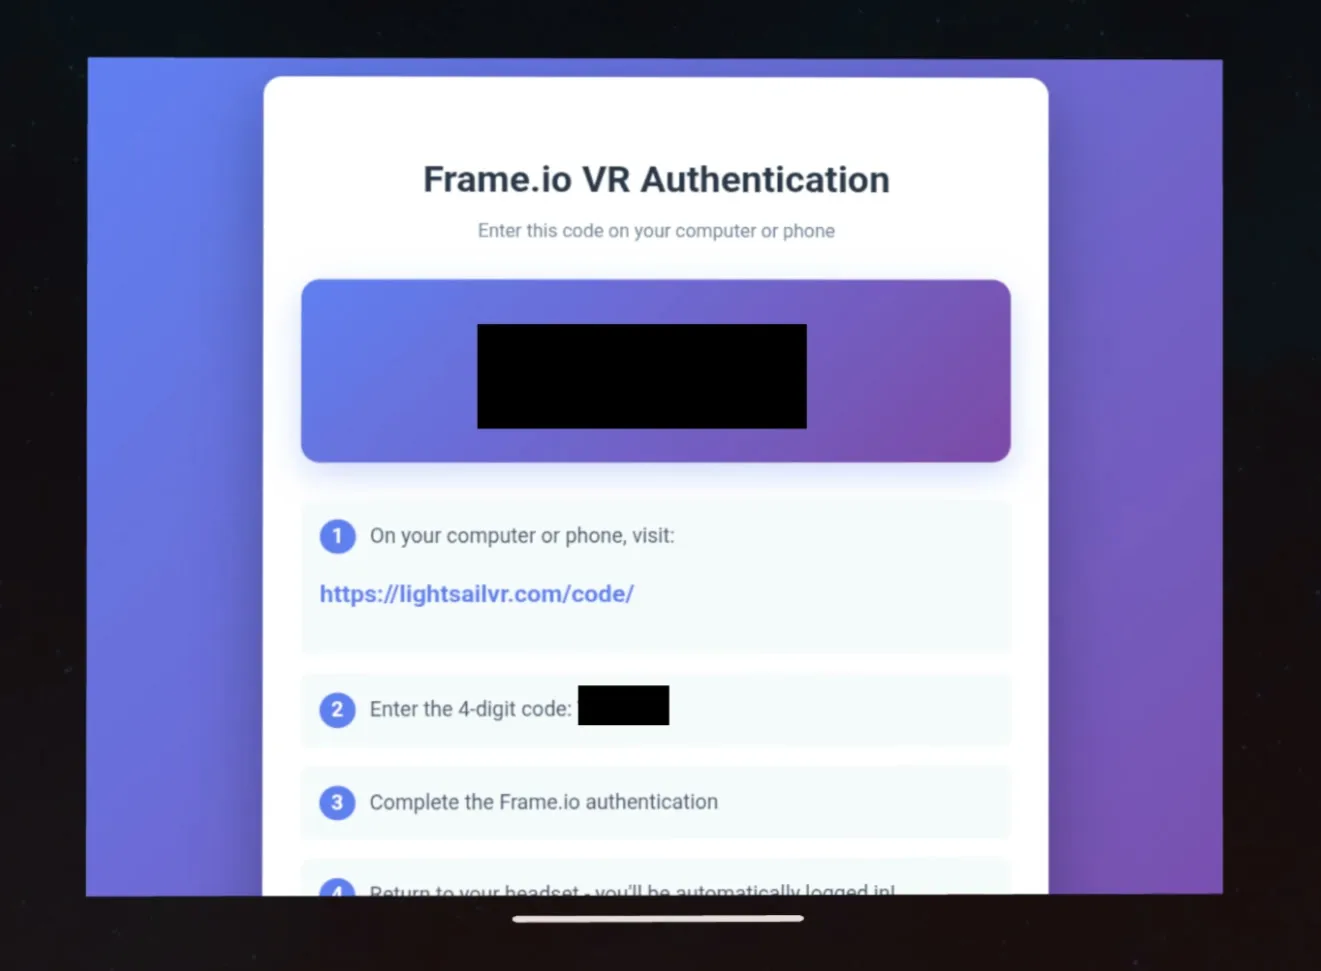
Step 2Note the 4-digit code
Screening Room shows a 4-digit code and the address to enter it at. Keep the headset handy — you'll come back to it.
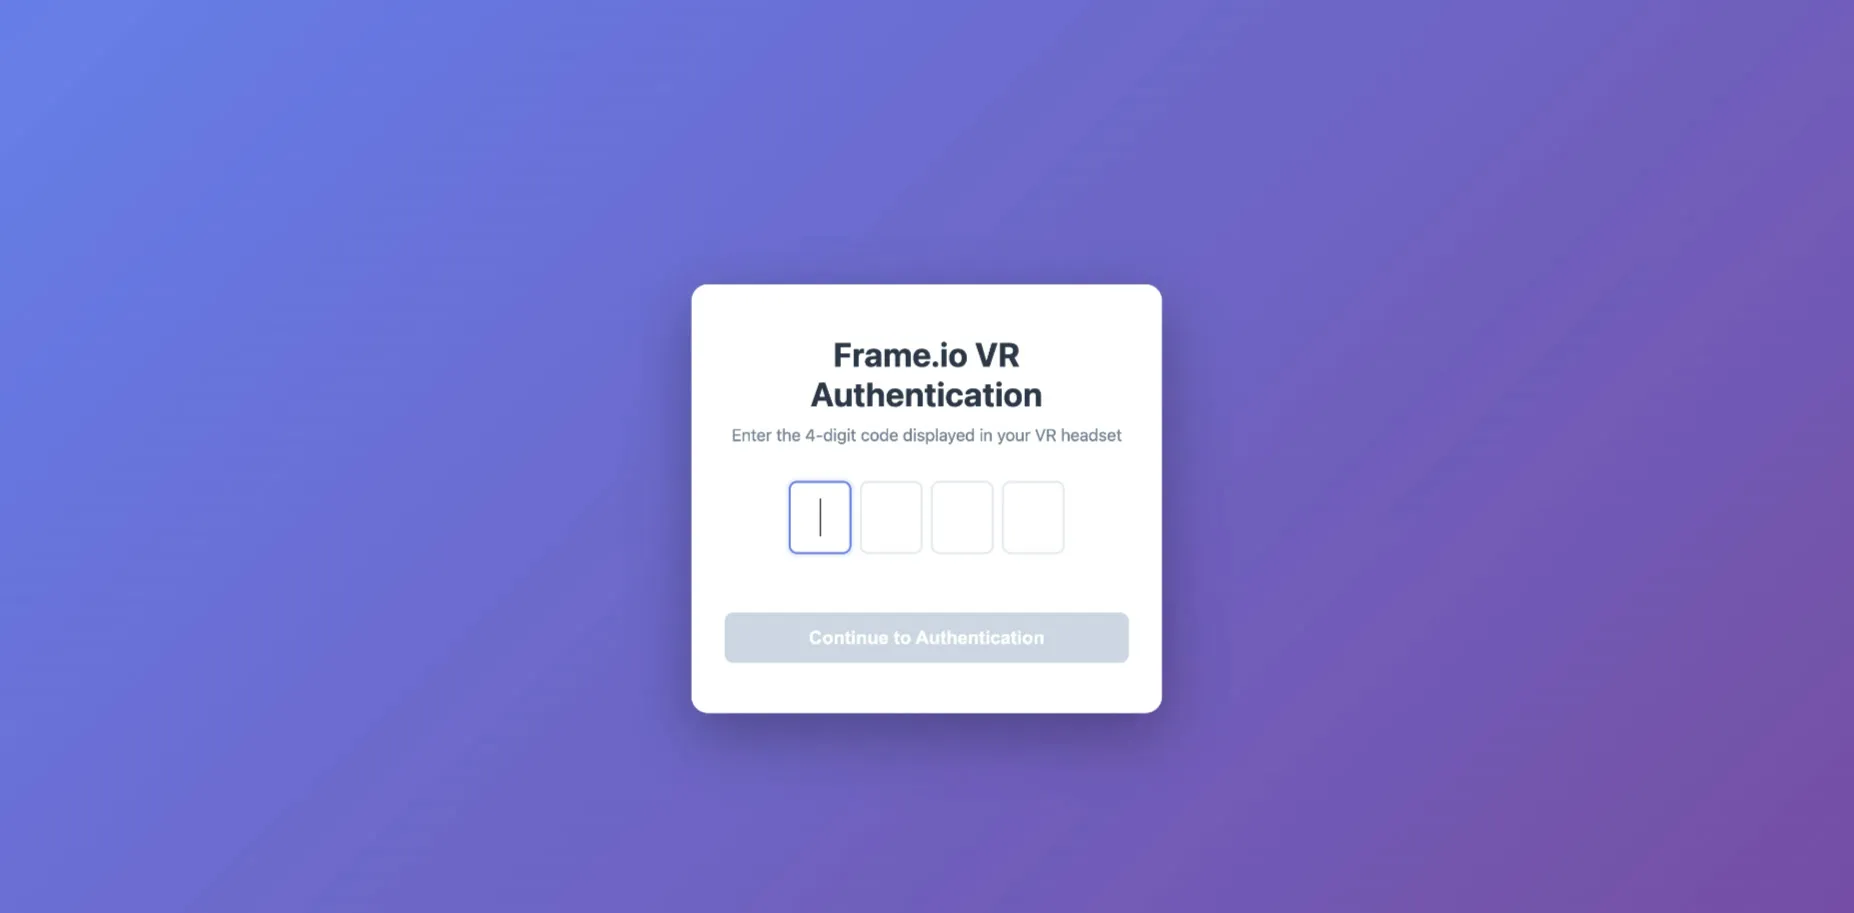
Step 3Enter the code at lightsailvr.com/code
On your computer or phone, open any browser and go to lightsailvr.com/code. Enter the code from the headset and select Continue to Authentication.
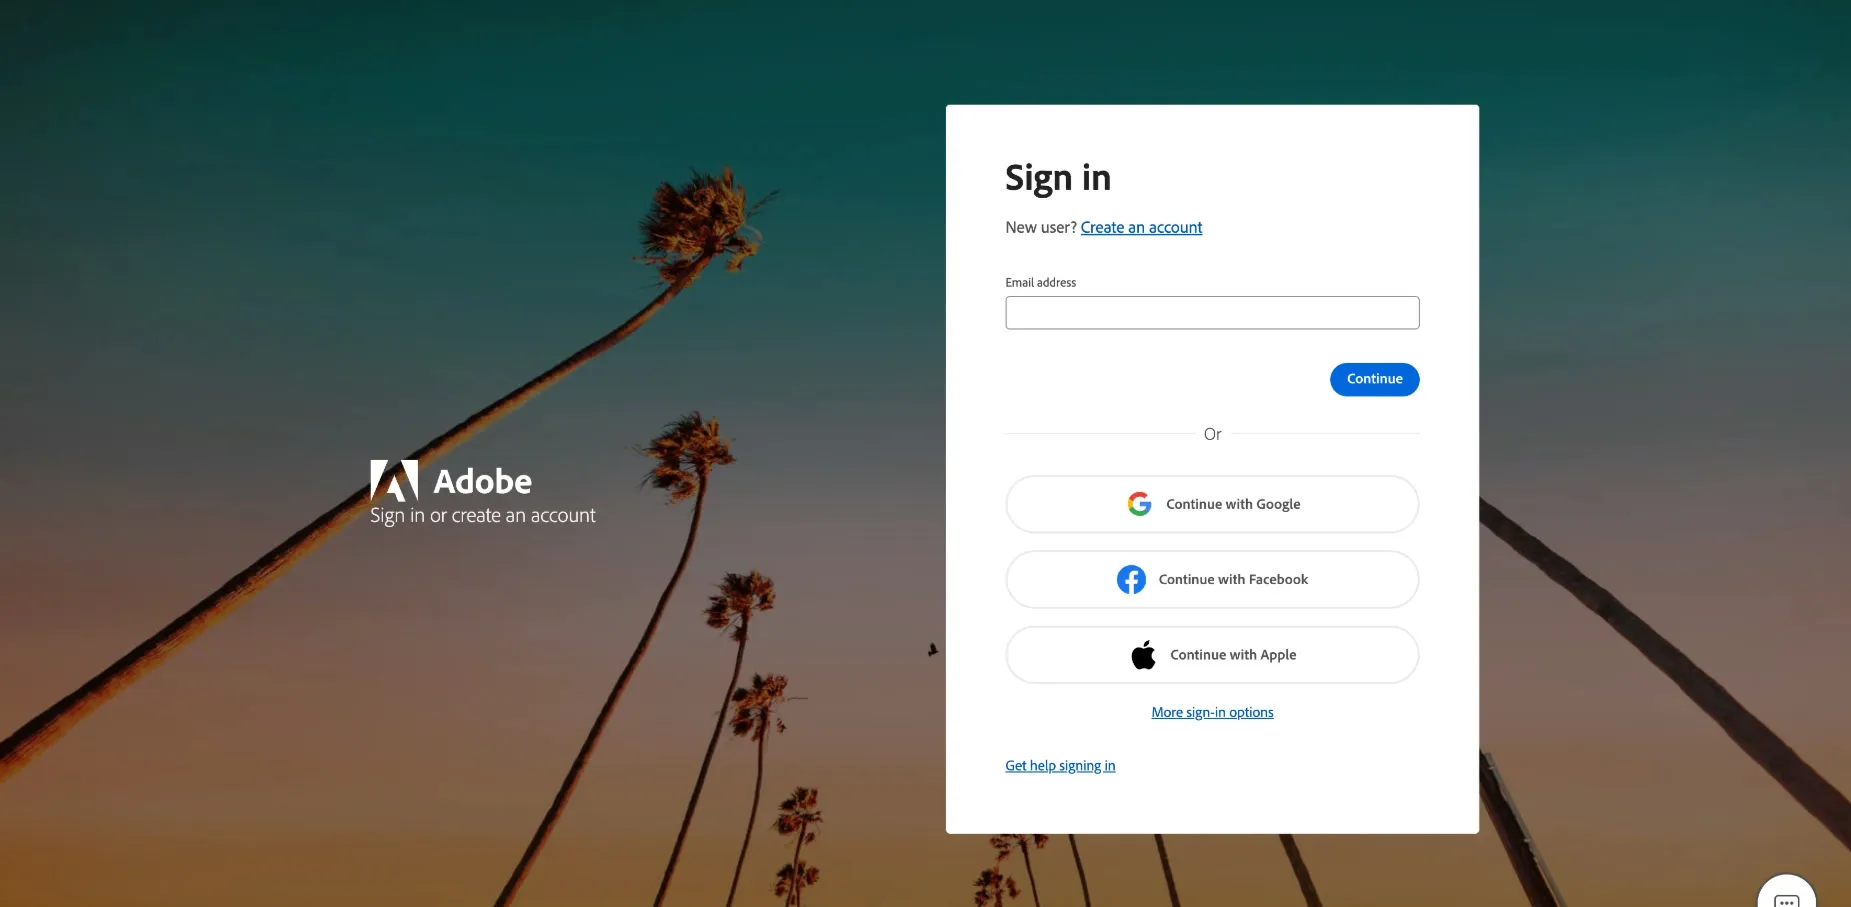
Step 4Sign in with Adobe and allow access
Enter your Adobe credentials as usual — if you're already signed in, this page passes straight through. Adobe then asks you to confirm that Screening Room can access your Frame.io content. Select Allow access.
Step 5Head back into the headset
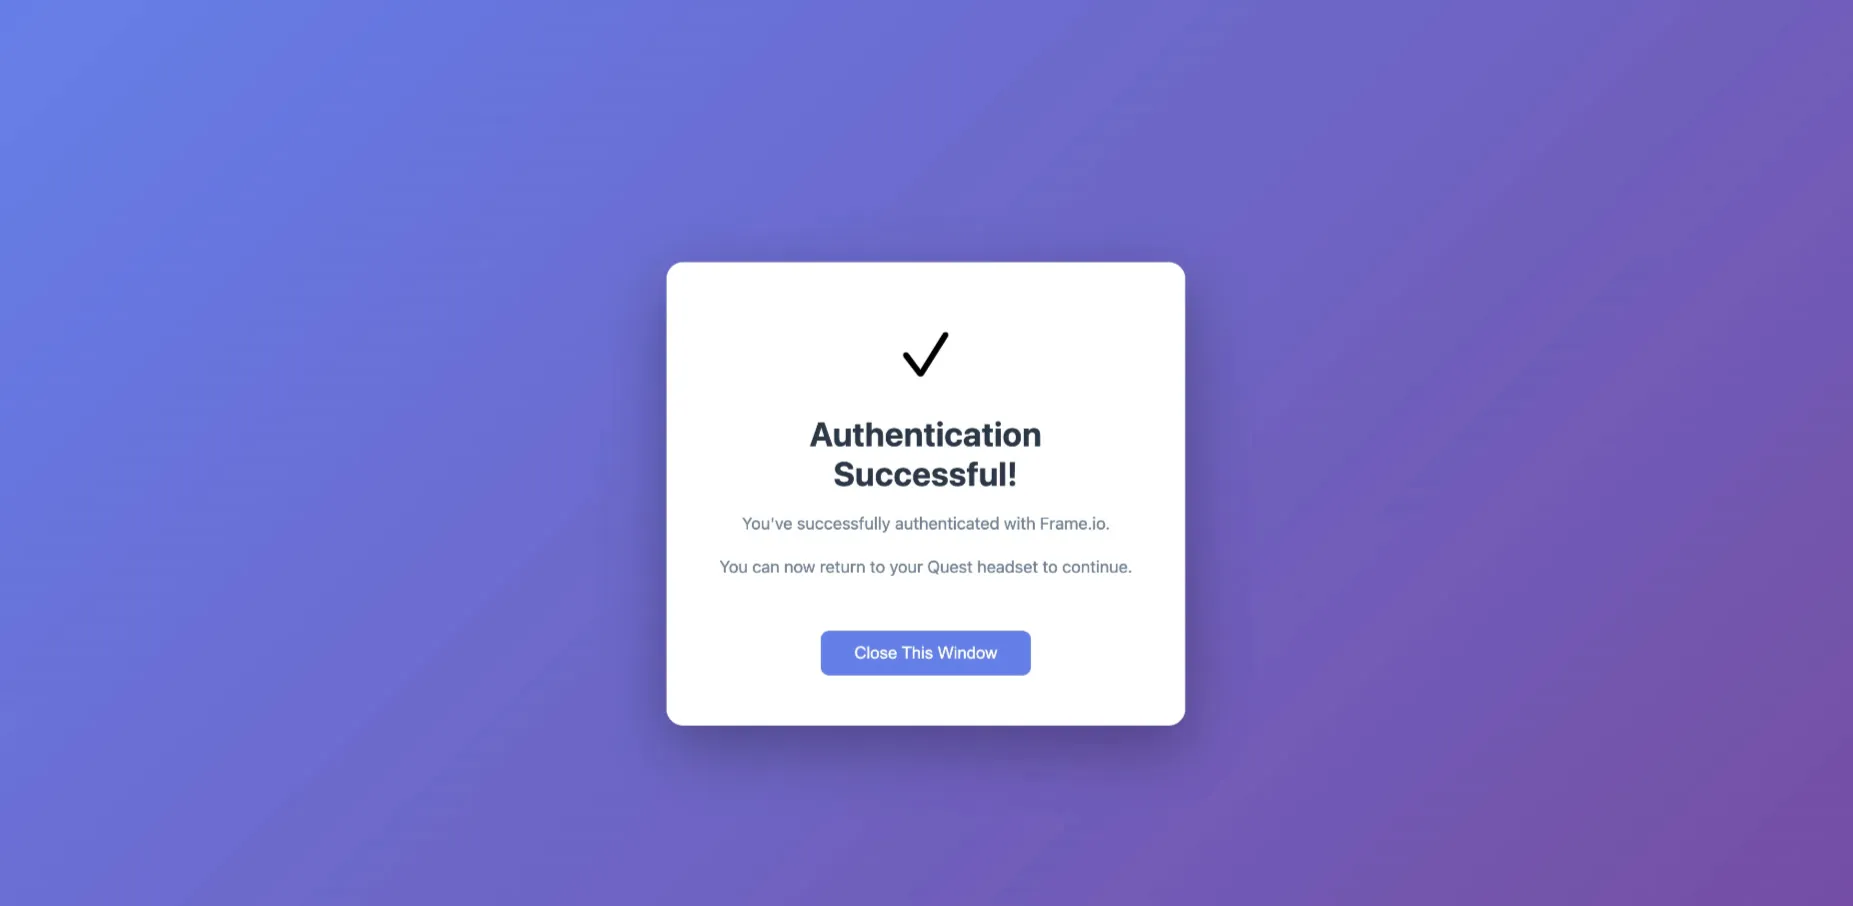
When the browser says authentication was successful, put the headset back on — Screening Room is signed in. You'll still select Log in with Frame.io each time you open the app, but the code step only happens on first setup or when you switch Frame.io accounts.
Find and download your video
The file browser follows one path: Account → Workspace → Project → Folders → Files. Sharing permissions can't be changed in the headset; do that in Frame.io on desktop or mobile.
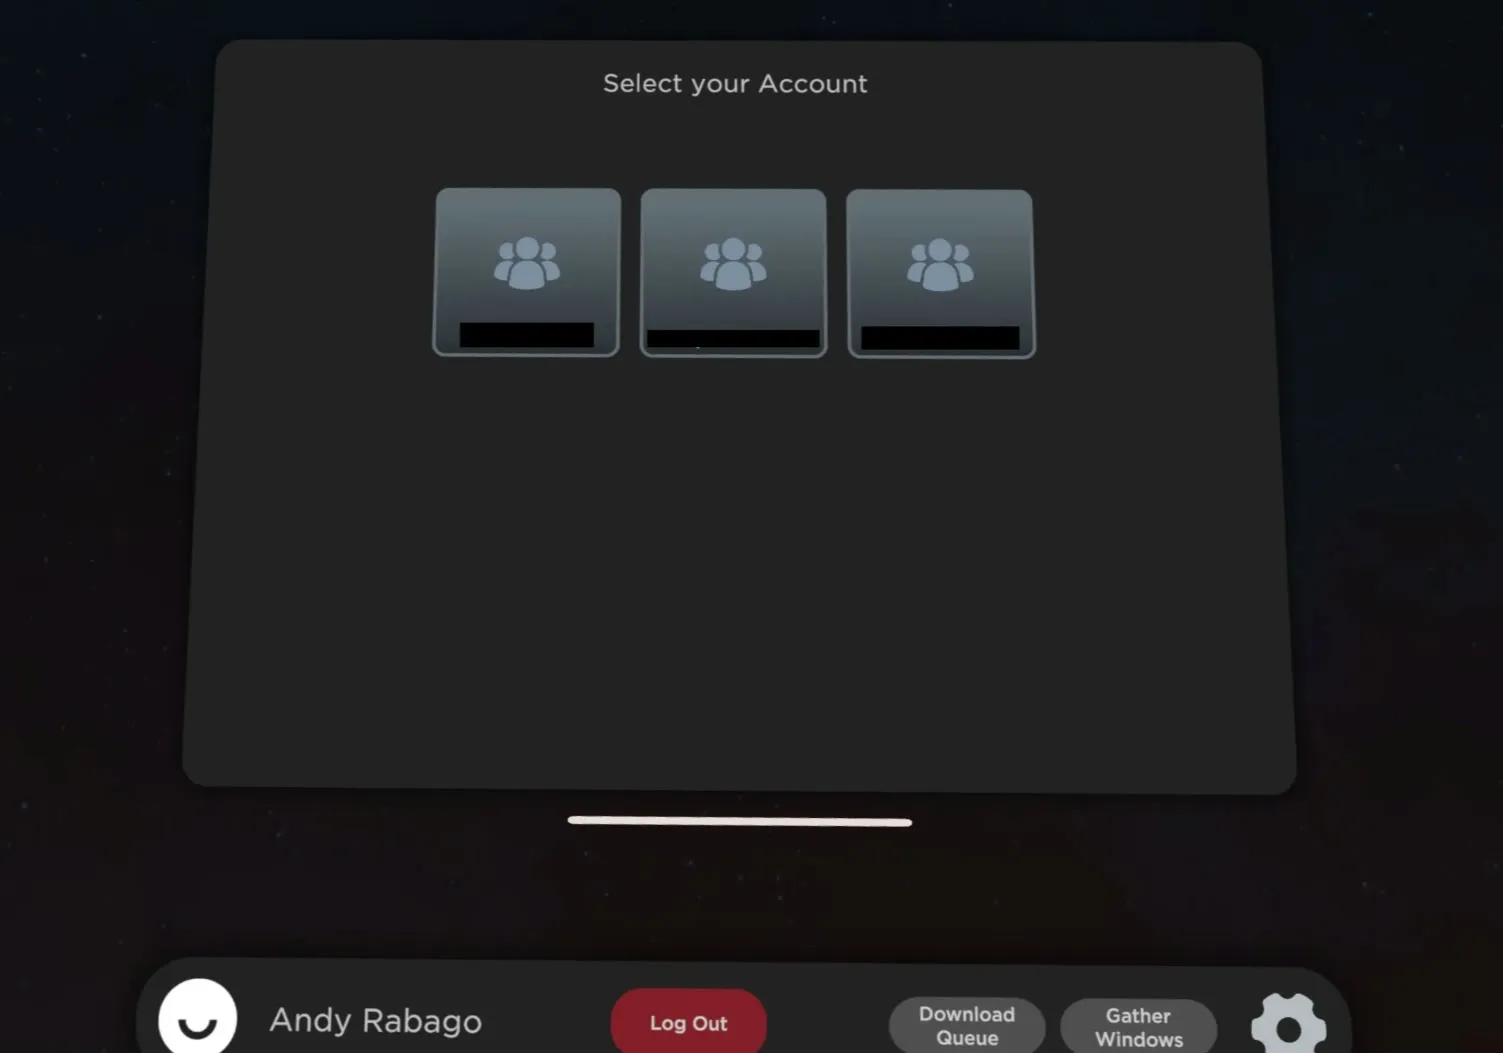
Step 6Pick your account and workspace
You'll see your account first — or several, if you collaborate on other teams' projects. Select one, then choose the workspace your project lives in.
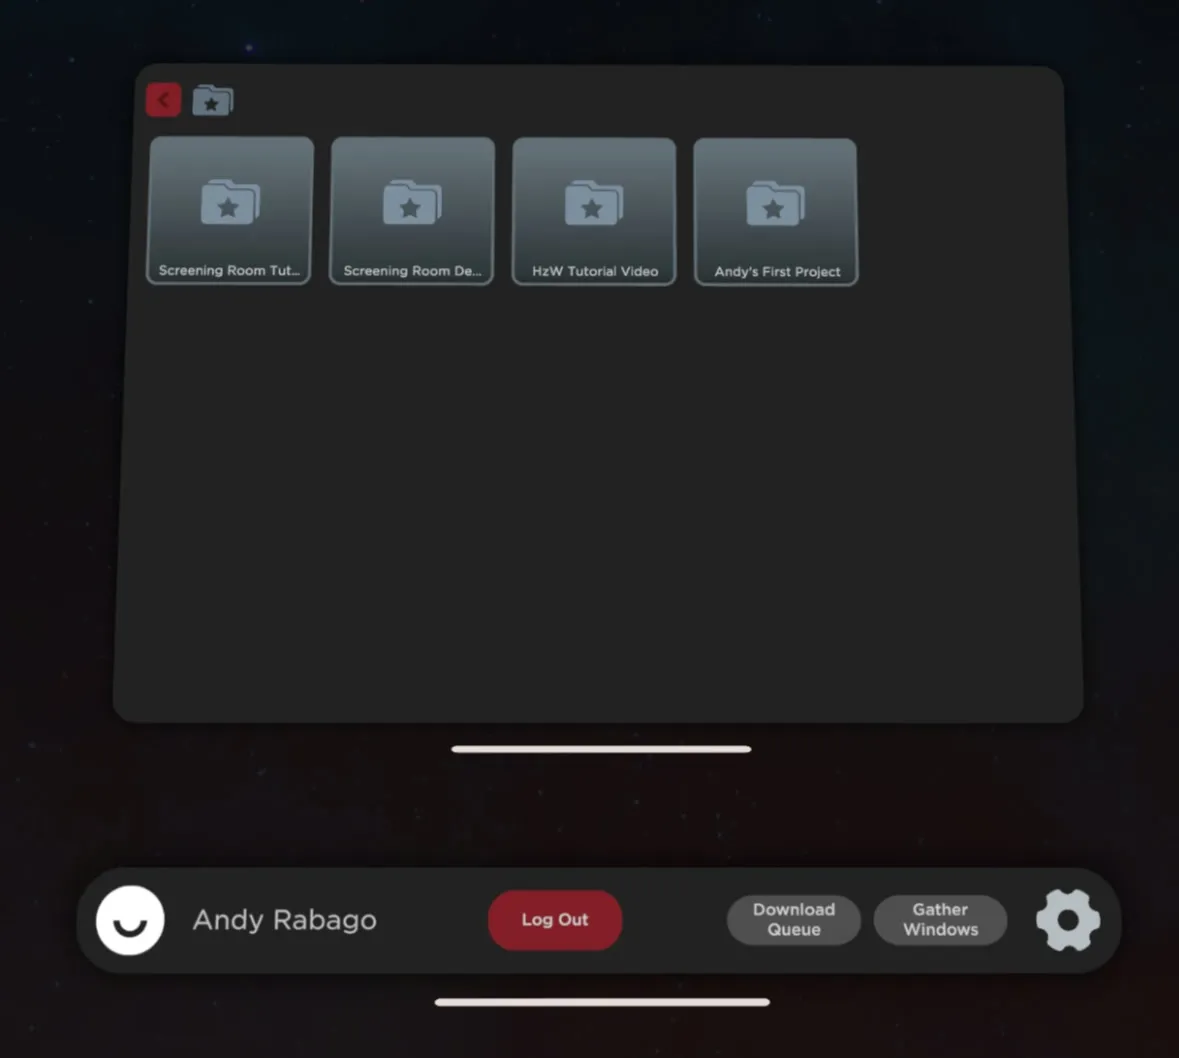
Step 7Open your project
Inside the workspace, open the project and move through its folders the same way you would in Frame.io on desktop or mobile.
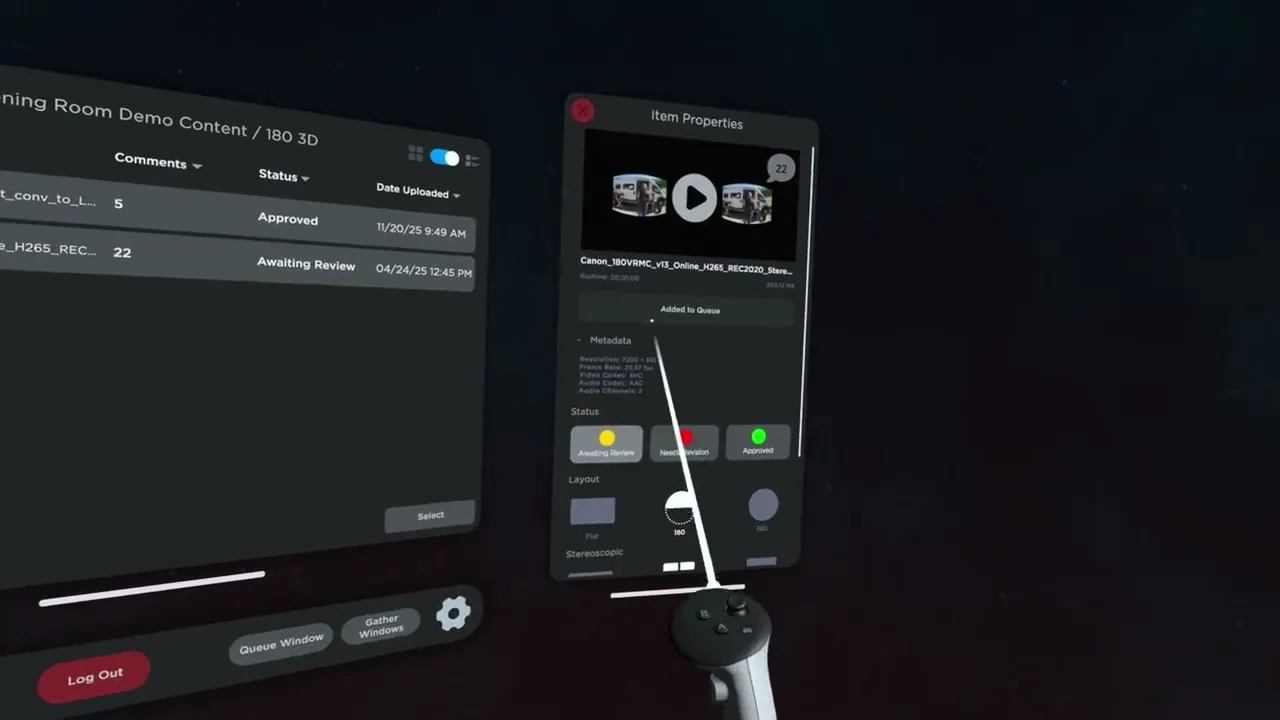
Step 8Select a video to open Item Properties
Select a video with your controller and Item Properties opens beside the browser. From here you can:
- Press play on the preview to start streaming
- Download it now, or add it to the queue
- Set its status: Awaiting Review, Needs Revision or Approved
- Override the default layout and stereo mode for this file
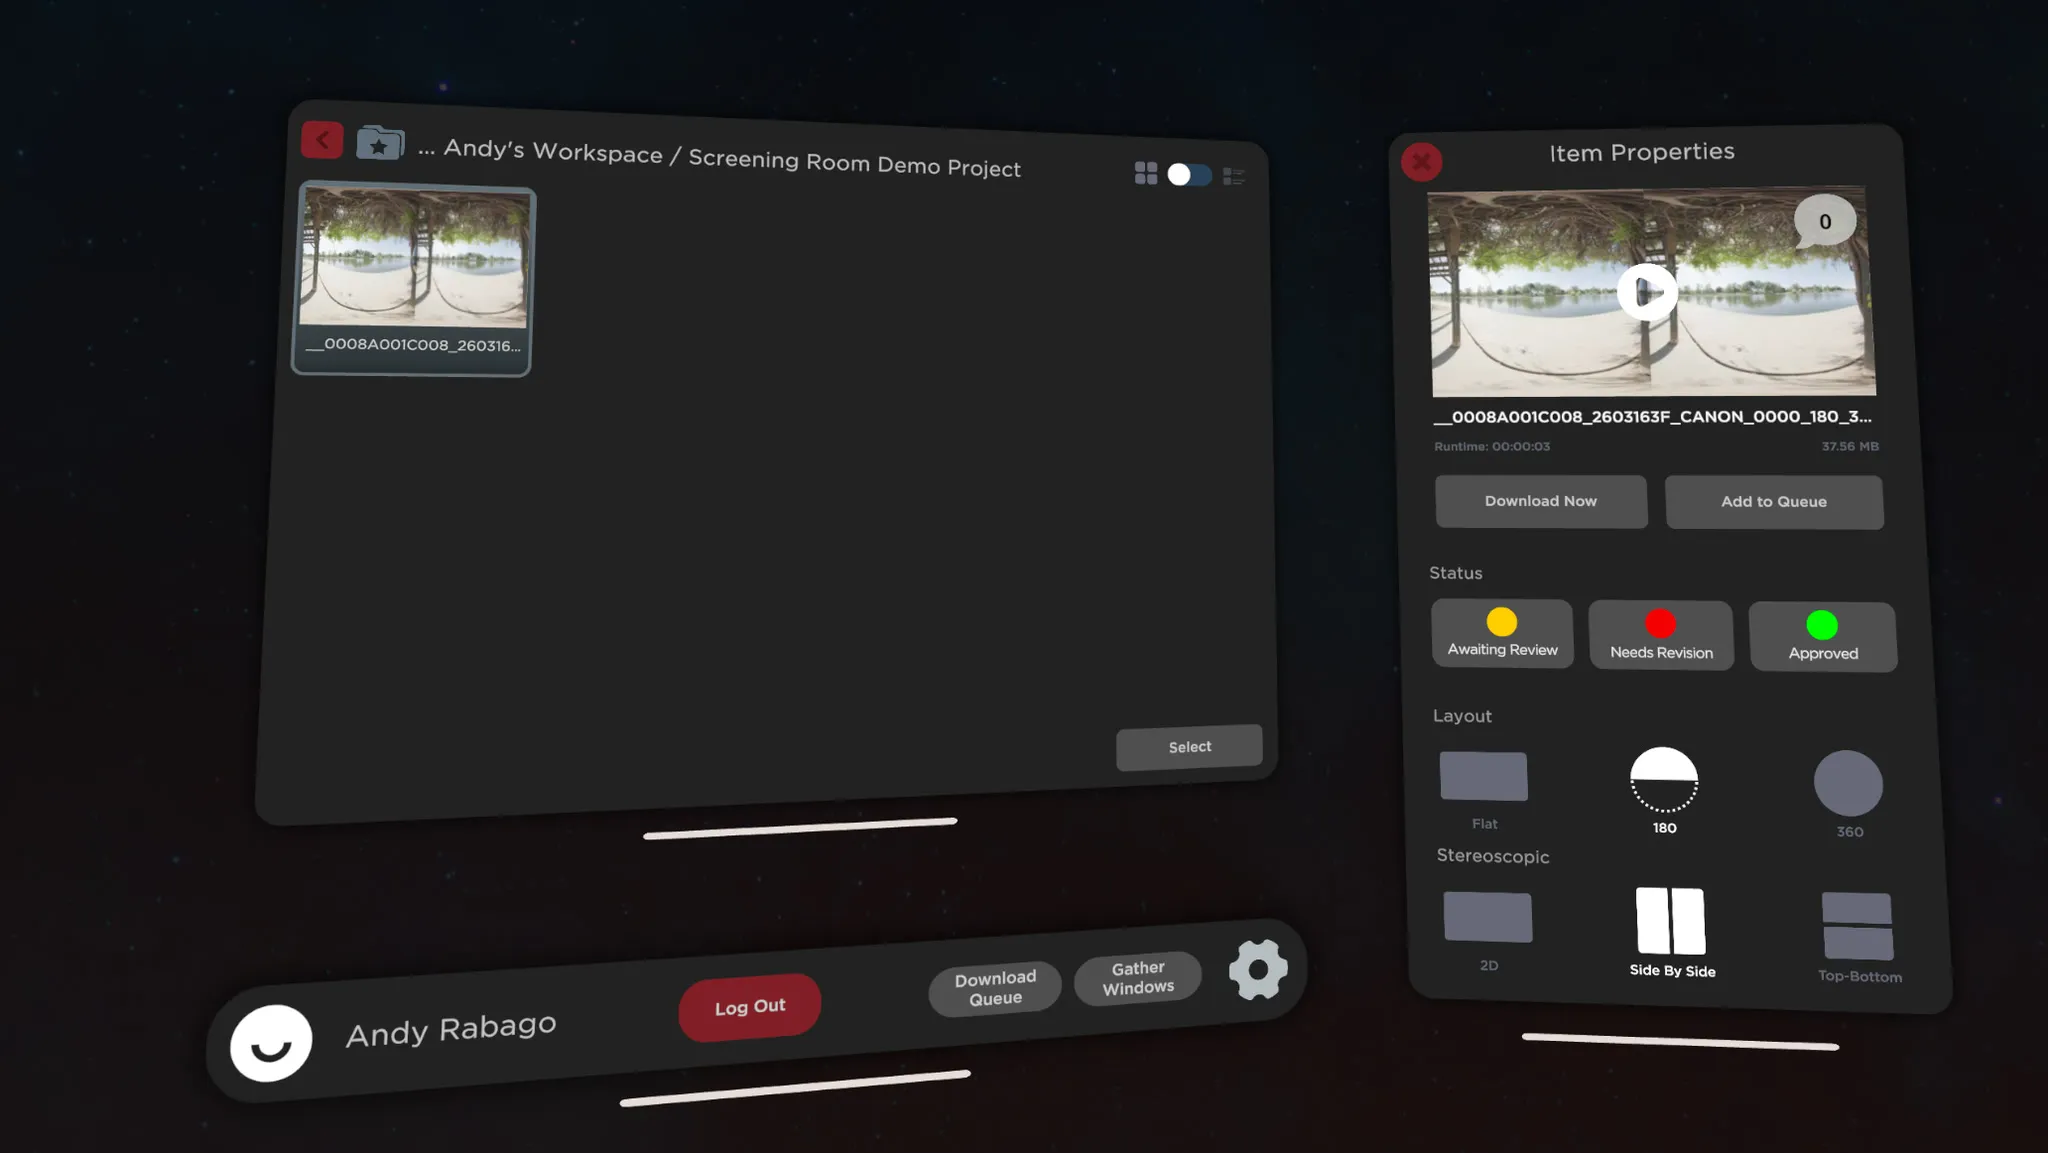
Streaming plays back at 4K. Download for full-resolution playback — useful for colour review and checking 3D graphics. Admins need to add the status options in Frame.io first. See our encoding recommendations for uploads.
Step 9Queue downloads
Add to Queue opens the Download Queue on the left. Start the queue, change which files download first, or clear ones you no longer need. VR files are large, so a strong connection makes a real difference.
Step 10Set your defaults
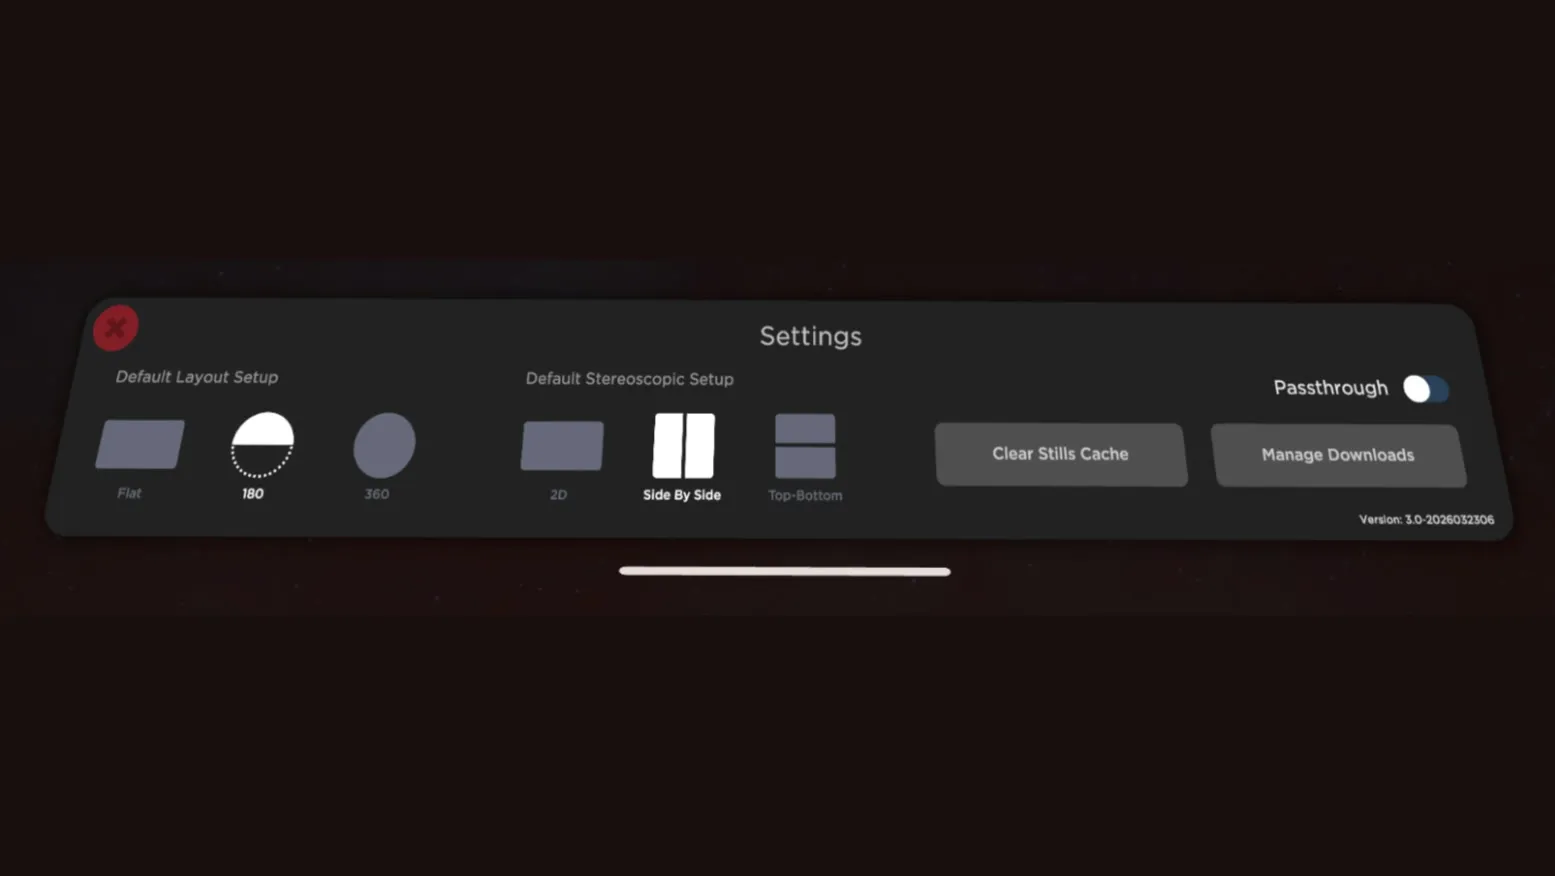
Select the gear in the bottom-right corner at any time to open Settings.
- Default layout: Flat, 180 or 360
- Default stereo mode: 2D, Side-By-Side or Top-Bottom
- Passthrough on or off
- Clear the stills cache, manage downloads, or log out to switch Frame.io accounts
Step 11Clear space with Manage Downloads
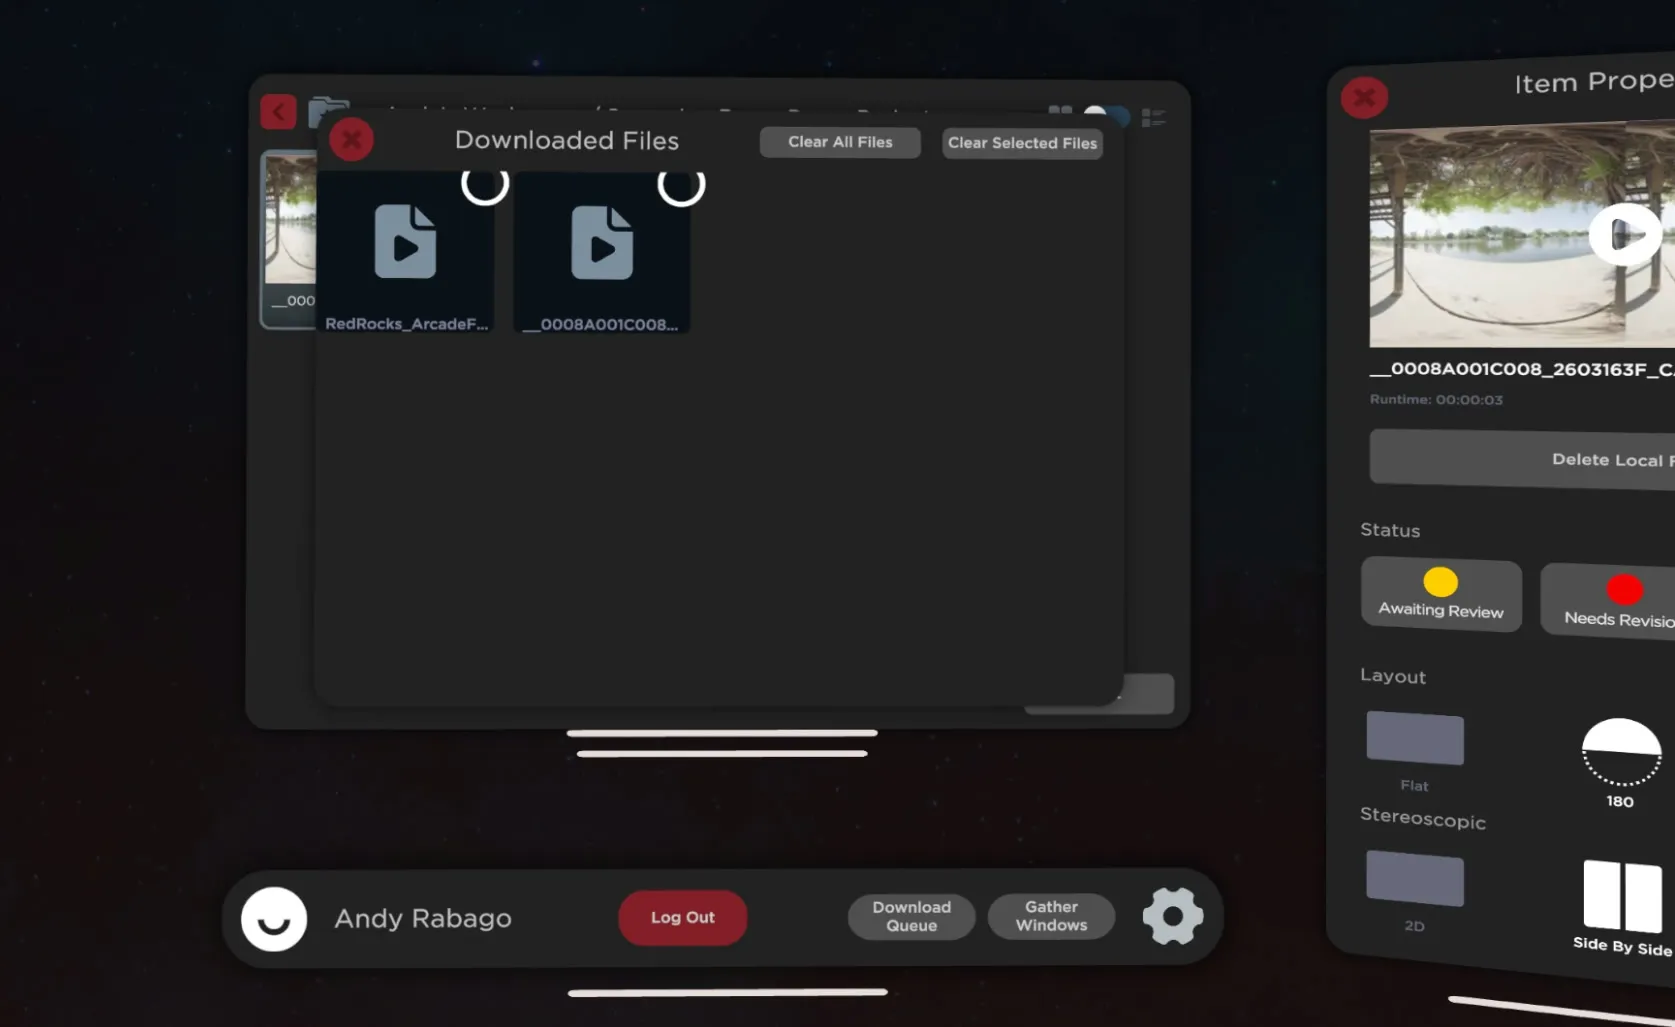
VR files fill a headset quickly. Open Manage Downloads from Settings, select what you no longer need and choose Clear Selected Files — or Clear All Files to start fresh. Downloads are saved to the Quest's Downloads folder, so other players such as Skybox VR can open them too.
Review in the player
These controls work the same whether you're streaming or playing a downloaded file.
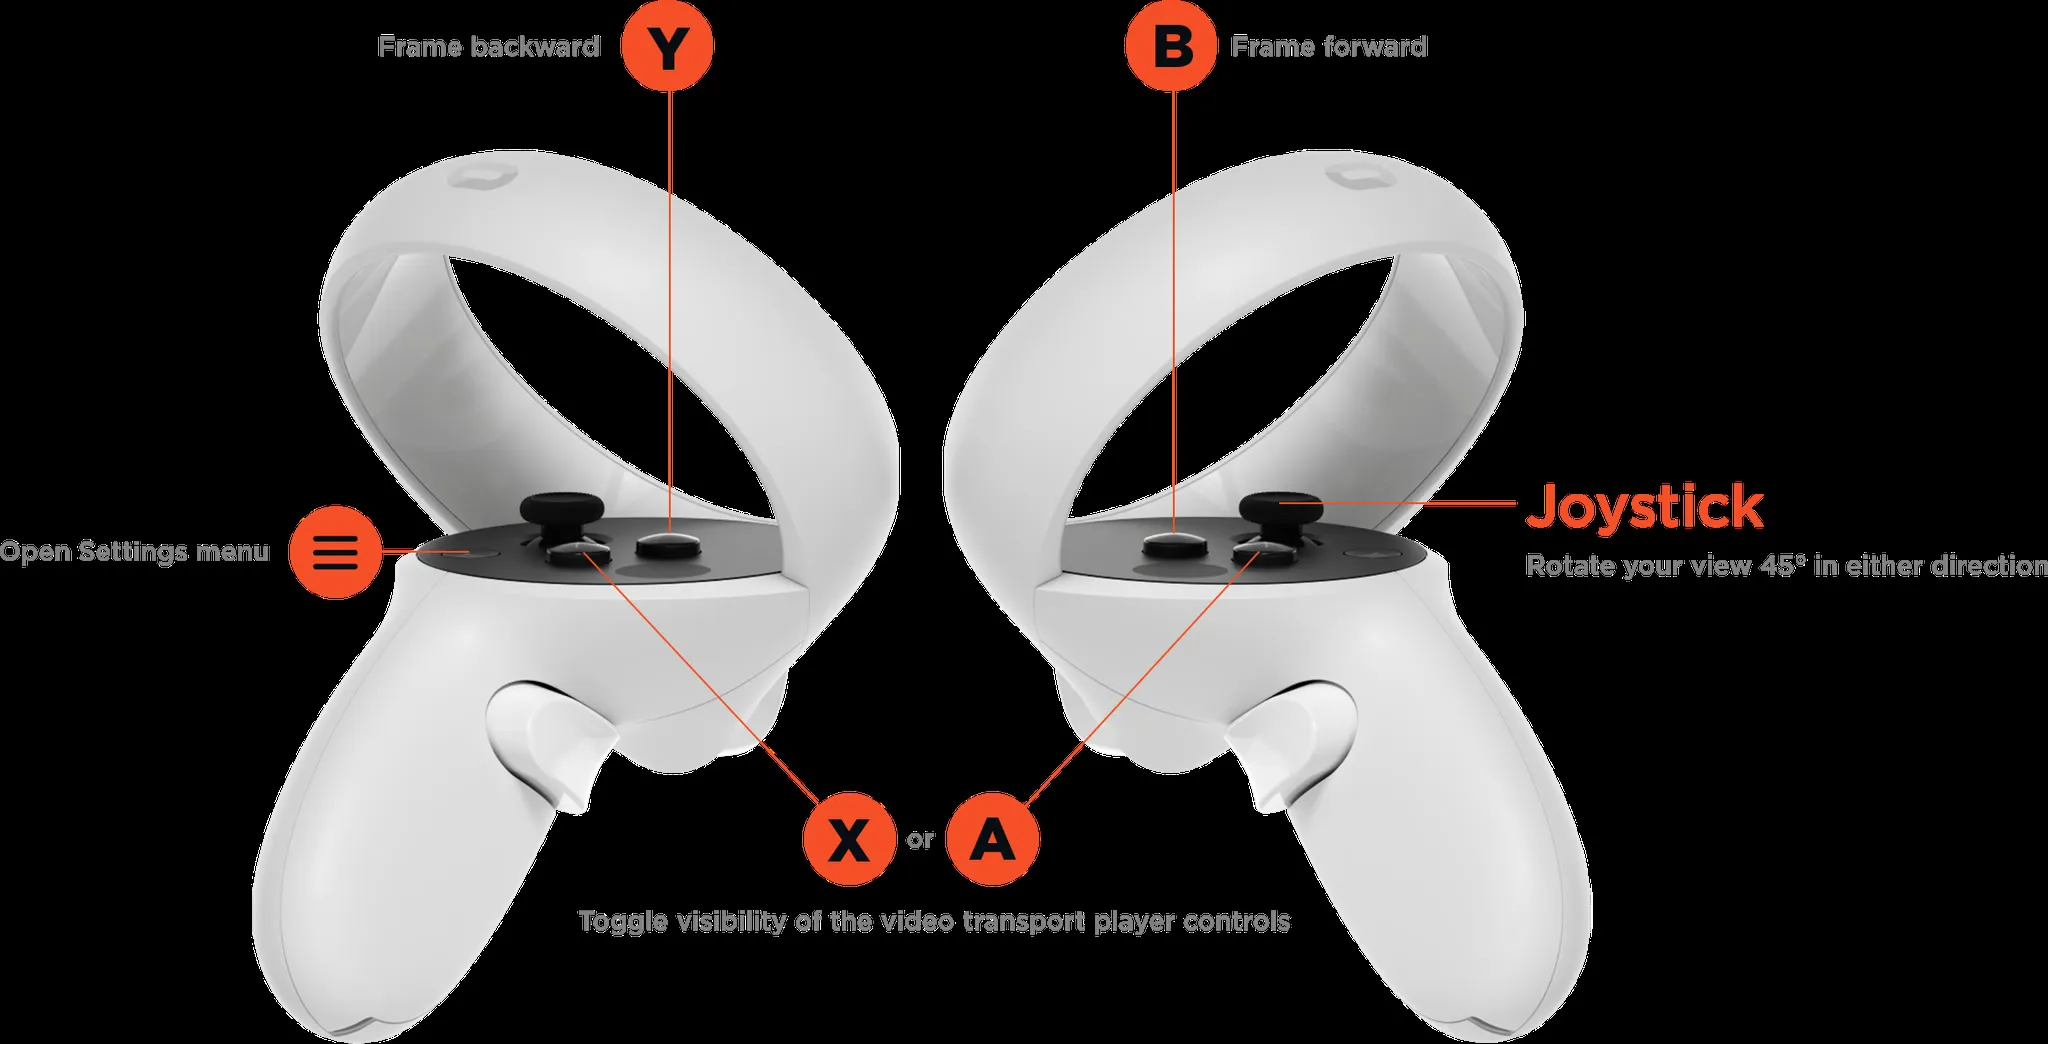
Step 12Learn the controller
- X or A: show or hide the transport controls
- Joystick: rotate your view 45° either way
- B: frame forward
- Y: frame backward
- Menu: open Settings
Step 13Use the transport
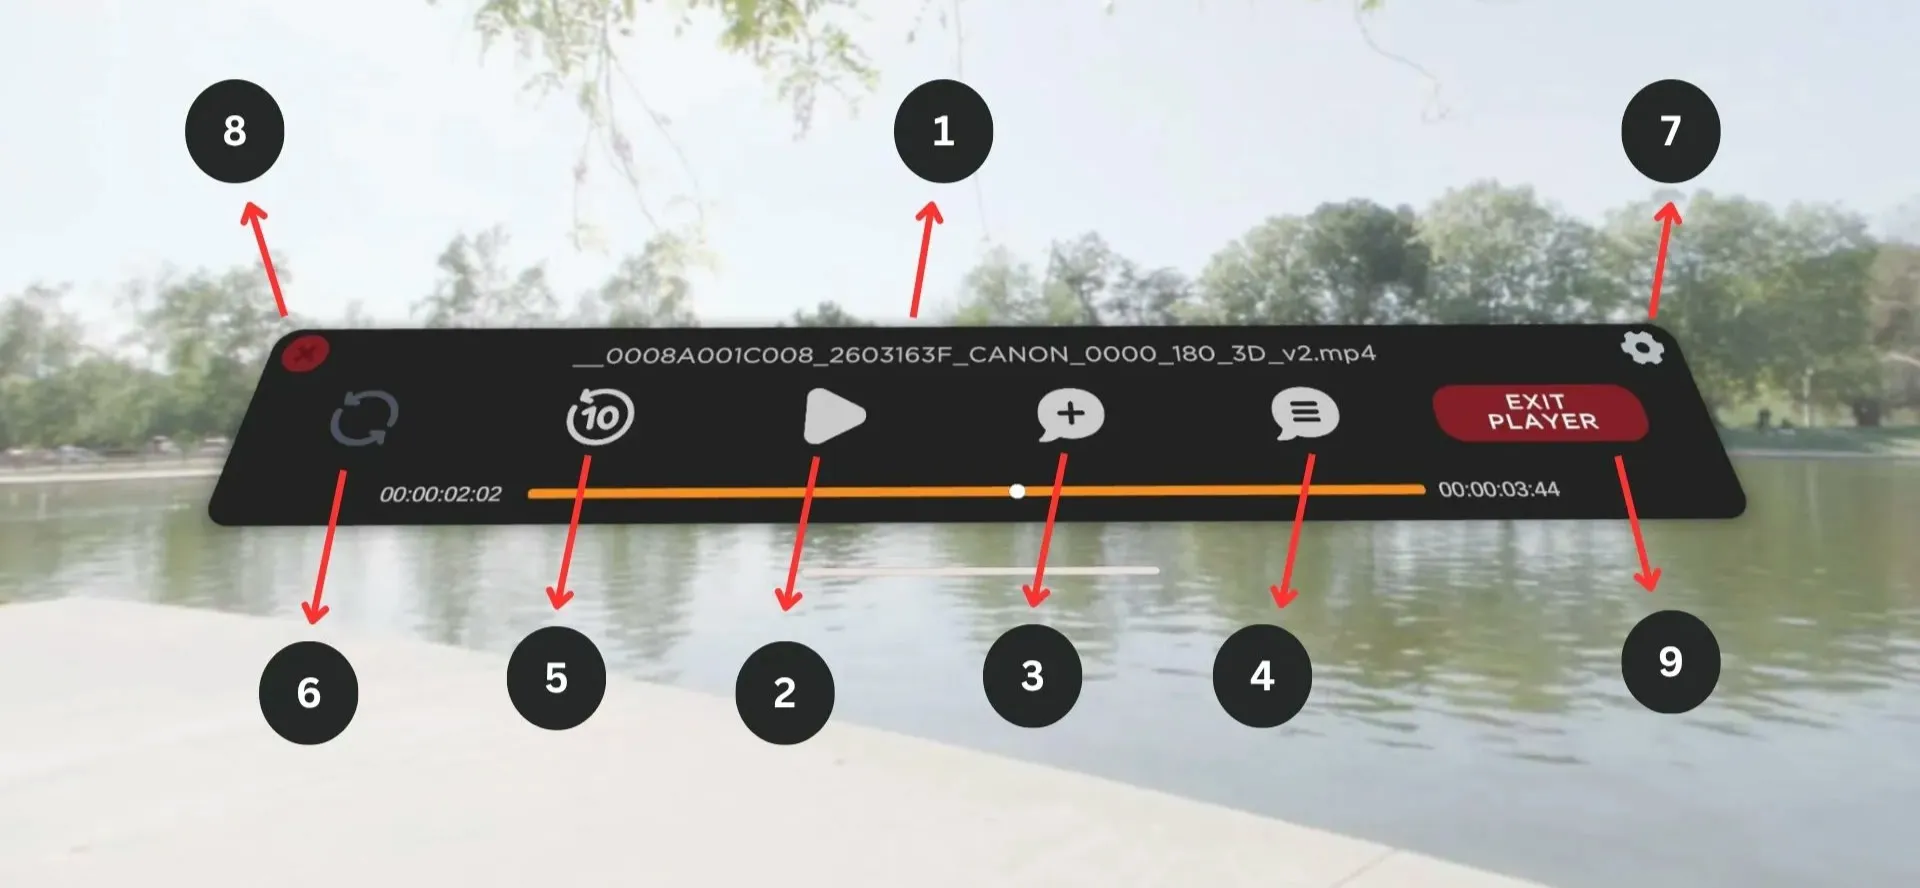
Press X or A to bring up the transport; press again to hide it. Select anywhere on the progress bar to jump there. The numbers match the screenshot:
- Video file name
- Play / pause
- Open the note window
- Open the comments window
- Rewind 10 seconds
- Loop the video
- Set the projection
- Hide the transport
- Close the video and return to the file browser
Step 14Match the projection to the file
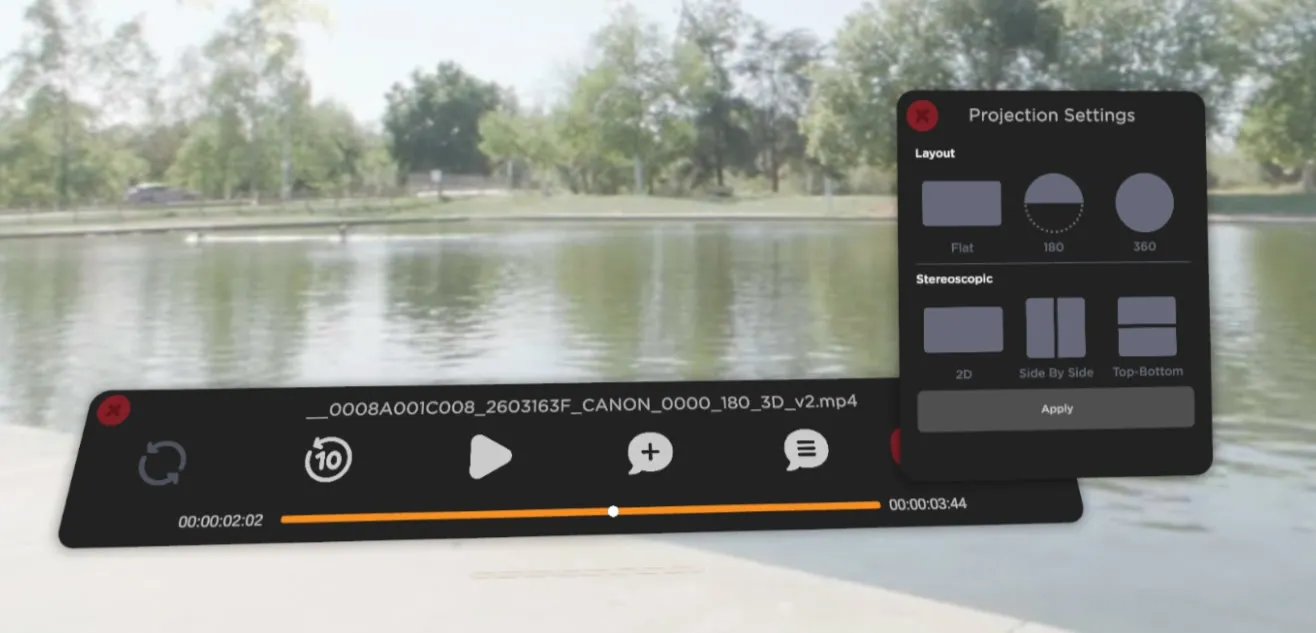
Select the gear on the transport to change how the video is displayed. The app defaults to 180 Side-By-Side; change that in Settings, or per file in Item Properties.
- Flat: a 2D screen — for trailers, or to see a whole equirectangular frame
- 180: a hemisphere, for 180° content
- 360: a full sphere, for 360° content
- 2D: monoscopic, or the whole frame-packed file
- Side By Side: stereo VR180, left eye then right, 2:1
- Top-Bottom: stereo 360, left eye on top, 1:1
Step 15Check the stereo
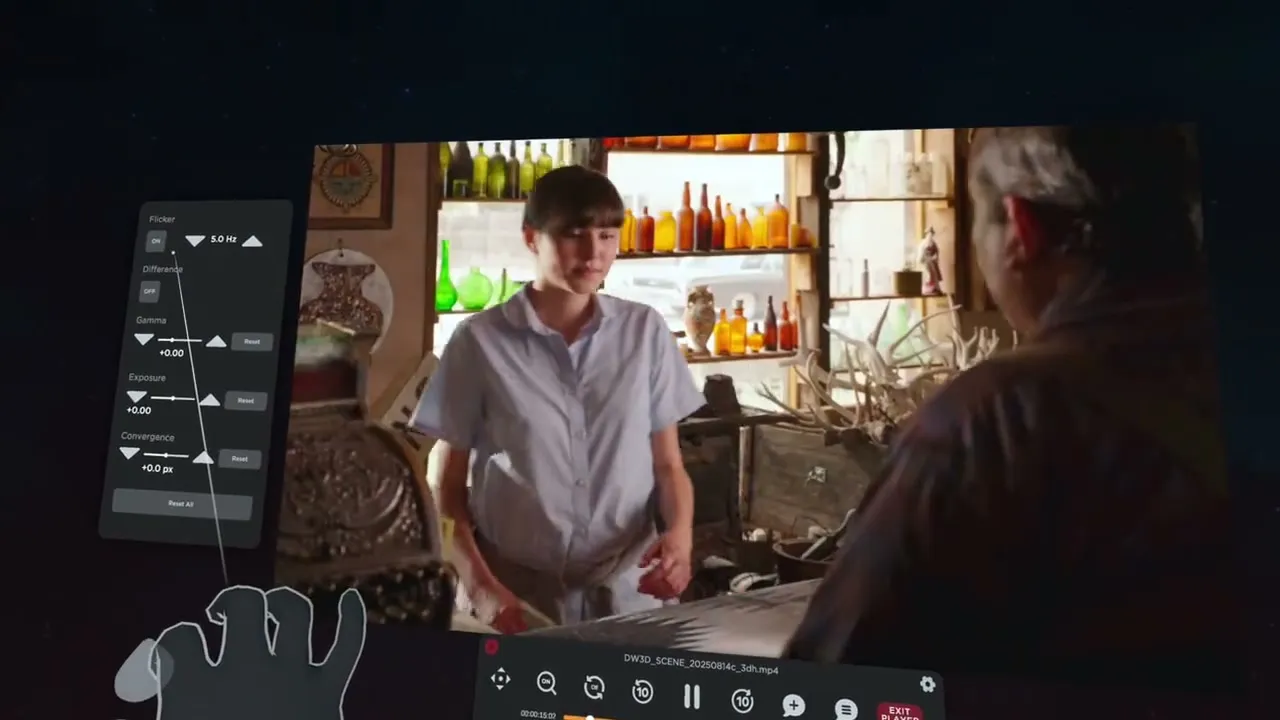
To confirm a file really is stereoscopic, open the projection settings and set the layout to Flat and the stereo mode to 2D. You should see the left- and right-eye images side by side — proof it will present in 3D once you switch back to Side By Side.
Step 16Leave a note
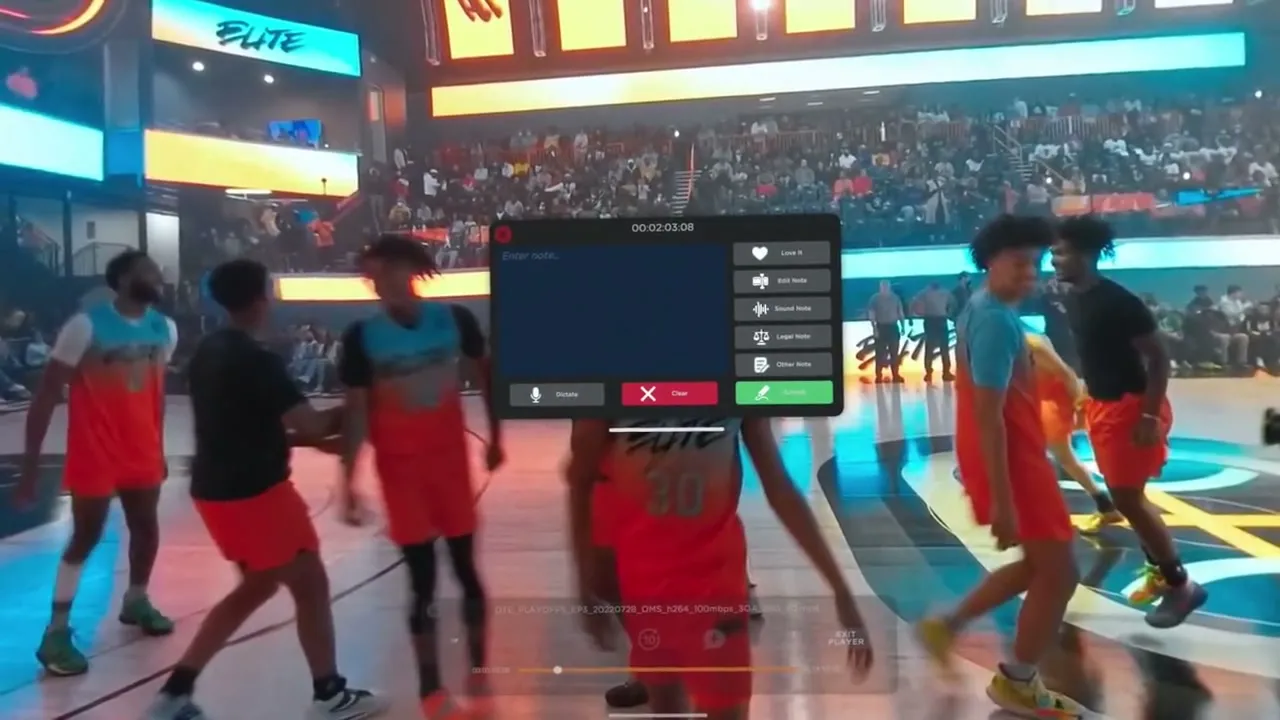
Select the note button and playback pauses as the note window opens. Pick one of the pre-made notes, or select the text box to write your own — the microphone in the bottom-left corner is quicker than the keyboard. Select Submit and the comment lands in Frame.io at that timecode.
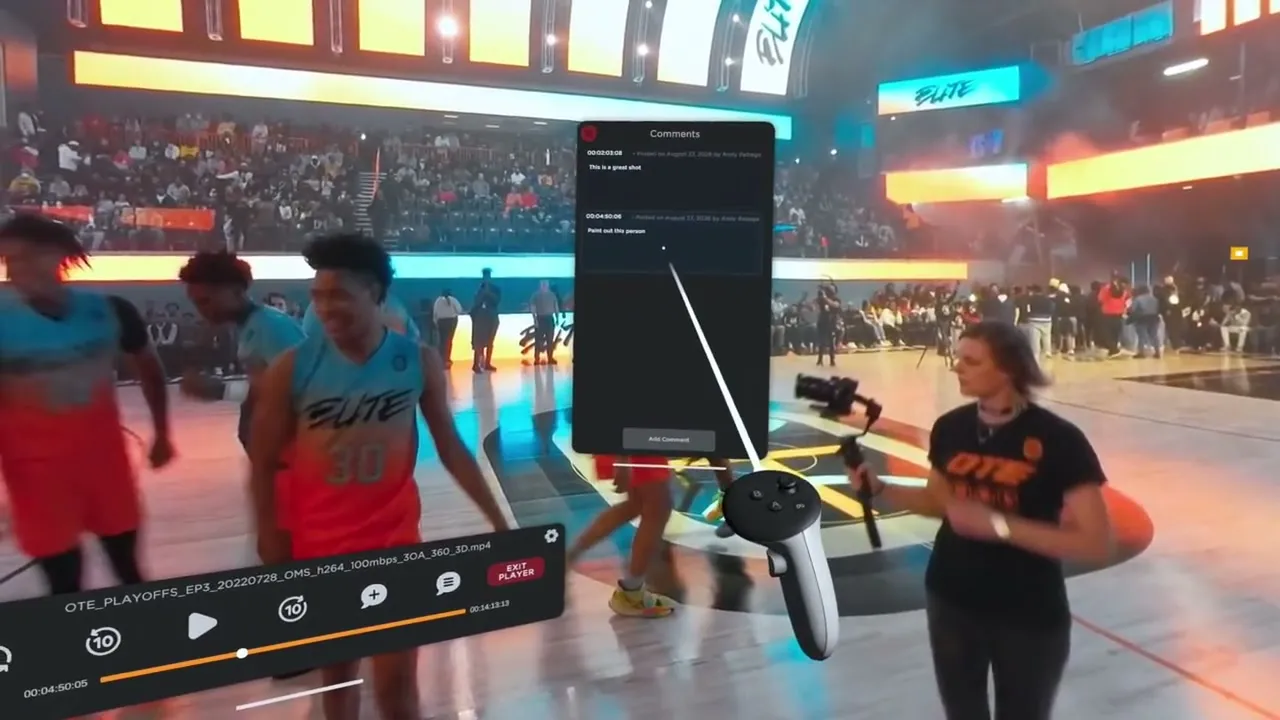
Step 17Read and jump to comments
The comments button, next to the note button, lists everyone's notes on the video. Scroll with the thumbstick while pointing at the window, and select a comment to jump the playhead to the exact frame it's about.
Still stuck?
Email the team that built it. Include your headset model and the build number from Settings — it gets you a useful answer much faster.